Importing an audiobook from its original CD format to an iTunes Playlist is most modern listener’s preference but it can be daunting when there are 12 to 99 separate tracks per audiobook disc. This is when the issue of precise tagging for each disc imported into iTunes becomes paramount.
Our last tutorial, Audiobook CD Import Settings, showed us how to adjust iTunes to maintain a quality listening experience while saving space on our computers and iPods. For those who listen to a book one time, never revisiting the same book twice, audiobook file size isn’t as important. But for those of us who love to have our iPods packed with both new listens and favorite re-listens, our gb space is a premium commodity. If you’re concerned with space constraints, check out the previous tutorial to change your default iTunes settings to audiobook quality standards then move on to this Tutorial which will ensure each imported disc plays in its correct order for a smooth listening experience.
When importing audiobook discs into iTunes, taking the time to tag each disc correctly before moving on to the next disc in the audiobook is a step well worth the effort. In the end it can save you time and frustration when listening to your completed book.
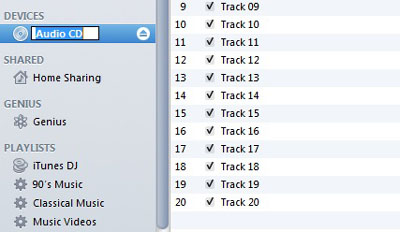
Open up iTunes – insert the audiobook CD – give iTunes time to recognize it and you’ll see this window asking if you want to import an unnamed CD, click No. We want to give each CD we import a disc number along with the book’s title.
Click on the “title” box under Devices on the left so it lights up allowing a change from the generic “Audio CD” to the disc number and book title we choose.
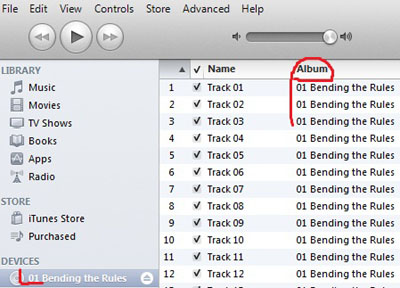
Enter the number of the disc – prefacing the first 9 discs with a zero as many books have more than 9 discs and the addition of the zero will keep the numbers flowing in the proper order. After the disc number, add the audiobook Title. When you click away from the title box you will see the Album title appear with the numbered tracks on the disc. You may see other information such as track length or a blank row for the artist name, etc. Those details can be ignored for now.
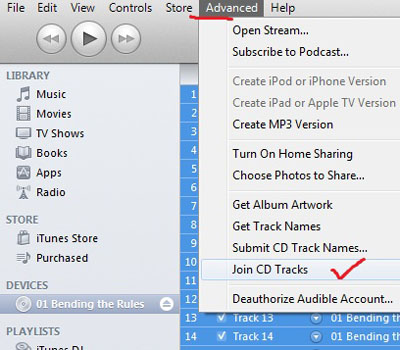
Now highlight all of the CD tracks so they are blue and chose Advanced from the menu at top. Click on Join CD Tracks. (Perfect tip to add S -thanks!)
Then look to the bottom right and click Import CD
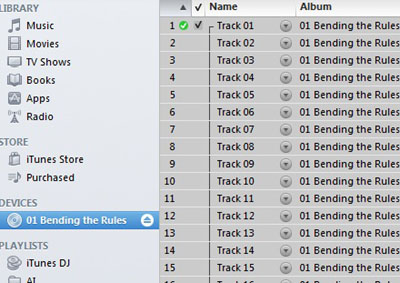
When the disc is finished downloading, you will hear a Ta Da sound and the top track will have a green check mark next to it. All the tracks are now shaded gray.
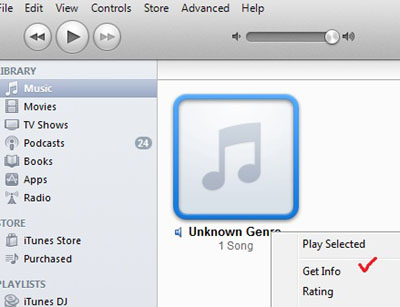
Eject the disc from your computer and you will be taken to the Music section of your library. Now is the time to tag the disc to alleviate any confusion before adding additional discs. Right click on the Unknown Genre album and chose Get Info from the drop down menu.
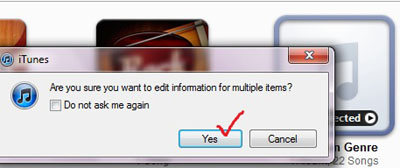
The next box will ask you if you want to edit info on multiple items – check yes.
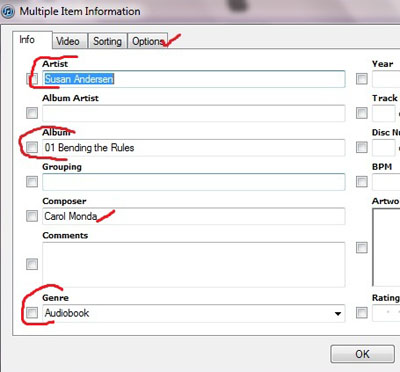
Here you will see the album title already filled in – you will need to add the author’s name as the Artist in the top box and Audiobook as the Genre in the bottom box at a minimum. I add the narrator name under Composer as a personal preference. Then select the Options tab at the top of the box – checked here in red
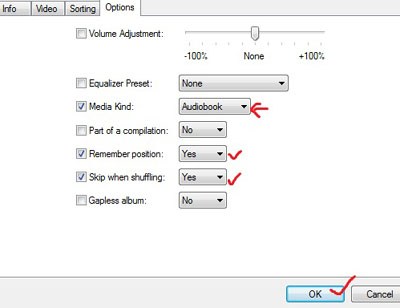
Click on the down arrow by Media Kind (the default is Music) and chose Audiobook. Then select Yes for both Remember position and Skip when shuffling. These choices enable auto bookmarking and keep your audiobook tracks out of your Music shuffle. Click OK at the bottom of the box when your choices match what you see here.
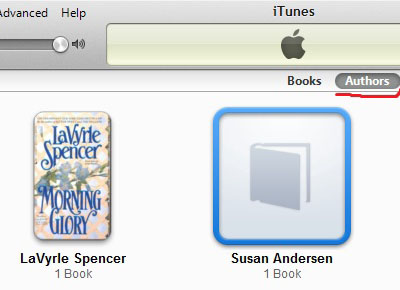
You will find your newly tagged audiobook disc under Books in your iTunes library – confirming your new book is there lets you know all has gone correctly. You can find your new book under Authors as seen here.
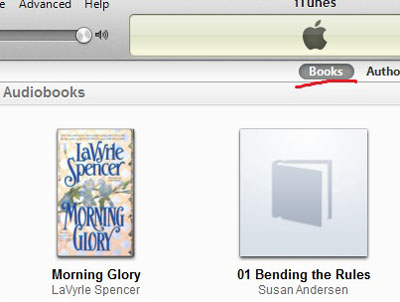
Or under Books as seen here – depending on how you “sort” your Audiobook library in iTunes.
At this point, you have successfully added your first audiobook disc. Now download each of the other CDs from the audiobook into iTunes using these same steps.
When you’re done importing the entire book, the next step is to connect your iPod to the computer and make a new Playlist with the audiobook Title as its name adding the converted discs of the book to the Playlist.
Brenda



Brenda, will books not sort well if I put the disc number AFTER the audiobook title as opposed to BEFORE it as you suggest (i.e. “Game of Thrones Disc 01” instead of “01 Game of Thrones”)?
as long as you’re consistent with Title Disc Number, seems like it would work. (Brenda retired from AG a few years back, so I don’t expect her to see this!)